
Everything you need to know about the App Store publishing
Whether you are a designer, developer, marketer or the client, you might want to have a better understanding of how the process of 'publishing an app' to the App Store, works and what it requires.
There is no charge for the information provided in this guide, but if you find it valuable, do us a favour and please share this page, maybe someone will find it useful someday.
iTunes Connect
The place where things happen
You might already know that if you want to submit an app to the App Store, there's quite a process behind the scenes. Your app will be reviewed by Apple Reviewers, a process that takes ~1 day, sometimes more, sometimes less. (btw, you can speed up the process link).
All in all, after you click the magic plus button and you create a new app, you find out that you have to fill in some details.
Before we proceed, please consider that you can't delete an app created on iTunes Connect if you don't have one approved version on the store. In other words, you have to make sure you will release that app, otherwise the delete button won't appear - is that a problem? - NO as far as I know, but I just wanted to let you know.
Firstly, you will have to choose the platform, that's easy (it should be, no discussion about this one), so we will skip this one. Concerning the rest of them, I suggest we take them down one by one:

Step 1
App Name
If you ever had the curiosity to click the "?" button for more info about this field, you will see the following:
“The name of your app as it will appear on the App Store. This can’t be longer than 50 characters.”
This is the "law" which should cover it, no questions here about the content of the field, the questions should be asked regarding how intuitive the name should be - which is entirely a different subject.
Developers..
Already know that sometimes the clients tend to come up with name ideas that are often too long or too complicated, even though 50 characters should be more than enough..


Step 2
Primary Language
This is quite important! From my experience that's usually English, because is an international spoken language and might contribute to your app success if more users can understand your app.
A golden rule would be to always try to make it be a perfect fit for your audience, if your targeted users speak Italian, I would go with Italian as a primary language without any hesitation. Also, keep in mind that this option should reflect the content of your app, it would be in your very disadvantage if you choose Italian as a primary language but your app has no Italian words in it.

Step 3
Bundle ID
What's a Bundle ID?
As a developer you already know, as a client you might wonder. Nevertheless, the wondering stops now..
Every iOS app requires an ID to work. This ID is nothing else but a string that is set up during development. It usually has the following form:
com.your-company.app-nameNow, people usually call it Bundle ID, but if you hear it being called as an App ID don't be surprised, they are often used interchangeably, but note that they are in fact two different things. Let me explain..
Apple docs state that an App ID is a two-part string used to identify one or more apps from a single development team. The two-part string consists of a Team ID and a Bundle ID search string, separated by a period (.).

Here's a self explanatory image, which also indicates that there are two types of APP IDs: explicit App ID (left side) and wildcard App IDs (right side).
More info about App IDs types here.
Nota bene: Bundle IDs are case sensitive.
If you don't know your app Bundle ID, ask your developer, if you are the developer then you should find it in Xcode defined here.

Step 4
SKU
SKU - as the image states, is just an Identifier. Now, iTunes Connect does not do a very good job on explaining what this is.
SKU - Stock Keeping Unit, is a distinct type of item for sale. The purpose of this SKU is that you can tie the app sales to whatever internal SKU number that your accounting is using. Also, it has to be unique, a good practice is to generate it like this:
e.g. : year + month + ID.
Once you hit the "Create" button, you have just created an application. Now the fun begins and as the title of this post is containing "App Store" in it, we will discuss only the App Store tab, which can be accessed by tapping on your newly created application.
We will start with the app information..
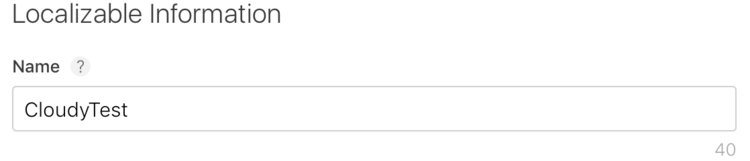
Your app name as it will be displayed on the App store, this can't be longer than 50 characters, in the image above you can see that I have 40 characters remaining.

The subtitle is optional and it represents a summary of your app, which will appear under your app's name. I personally never use it..

If your organization or company has a privacy policy, this is the place to link it. Copy-paste your link in here if it's a fit for your app too.

Now, we can also see this on the right side.. This option indicates that these info are localized into English (US), bear in mind that if your content is not in English, you should change it.

Ex-info
There's a general information section which shows what you previously entered..
Also, you can see the Apple ID which is automatically generated and assigned to your app.

Now, last but not least, we have the Category, License Agreement and Rating sections.
Category is very important, it basically places your app between other apps that have the same purpose. It should always describe your app, if you are not sure about what to select, please visit the following link for more details. Also, you have a secondary category, which is a great way of making your app 'domain' wider, so set a second one, don't be shy, it might help.
License Agreement - well, I will not cover this section because something is wrong with Apple's links as they appear to be broken, maybe they will change something, maybe they won't, either way we will skip it for now.
Rating - the app rating that will display on the App Store is the same across all platforms and it is based on the app's platform with the highest rating.

In the image above, I present how to edit the app's rating. You basically have to click on your iOS app version (here 1.0) and by scrolling down a bit you will see the Rating option.
Screenshots
iOS App
If you intend to publish an iOS app, you basically have two options:
1. Take screenshots for every dimension of device Apple has: 3.5 inch, 4.0 inch, 4.7 inch, 5.5 inch (hard way, not recommended)
2. Take screenshots for 5.5 inch (iPhone Plus - 6, 6S or 7 would do) - EASY WAY! - and they will be scaled accordingly for every other device type.

iPad App
If you are going to publish an iPad app, here you have the requirements:

tvOS App
If you are one of the few tvOS developers out there, here's what you need:

watchOS App
If you are going for a watchOS app, Apple requires the following:

iMessage App
Last but not least, iMessage apps should have some screenshots too, see below what is expected:

Now, there's an entire discussion on the 'screenshots' topic. Why is there so much interested in screenshots? Screenshots should be eye-candy, should explain plain and simple what the app does and should increase the interest for the app, if possible. More info and strategies that are useful you can find here.
All being said, this is the current situation of the App Store. Here you have an explanatory guide that should help you understand what is required in order to release an application on the App Store.
Feel free to ask any questions you have and I will do my best to answer each one of them.